How-To


1. To login or register, click on the account menu icon located in the upper right corner of the page.
2. Click My Account to access your general account information or view payment methods and modify your password, phone number, title, or clinic name.


Invite patients to register for OrthoPacks
1. In the Dashboard under the Manage Patients tab, click the Add Patient button.
- A modal will pop up.

2. Enter Patient Information
- Enter the patient's first name, last name, and email address.
3. Click Save
- Repeat this step if you need to add more patients.
4. Send Invitations
- When finished, click Send Invite.

5. Optional: Send Protocol with Invite
- If desired, select Send Protocol with Invite.
- Dropdown menus for protocol and duration will appear.
- Select a protocol and a duration.
6. Optional: Include a Personalized Message
- If desired, select Include a Personalized Message.
- A text field will populate.
- Enter your message and click Send Invite.

The patient will be directed to OrthoPacks.com/Registration/Patient with your provider registration code and the patient’s first name, last name and email address prefilled. The patient will need to complete the remaining fields.
Complete the registration form for your patient
1. In the Dashboard under the Manage Patients tab, click the Add Patient button.
- A modal will pop up.
2. Enter Patient Information
- Enter the patient's first name, last name, and email address.
3. Click Save
- Repeat this step if you need to add more patients.
4. Complete registration form
- When finished, click Complete registration form.

Please note: You will need to complete ALL registration form fields, including creating a temporary password. The patient can then log in and change their password.
Starting an Order
1. Under Manage Orders
- Click New Patient Order.

2. Using the Navigation Bar
- Select Build Your Pack.

3. Under "Manage Patients"
- Select a patient and click Start Order in their Actions dropdown menu.

Building and Configuring Packs
1. Add Products
- Click the Add button on all products needed to complete the order.

2. Proceed to Configure Packs
- After selecting all products, click Configure Packs at the bottom of the screen.

3. Assign the Order to a Patient
- Select the patient who will receive the order from the dropdown menu.

4. Add Products to Packs
- Click Add Products for the specific time of day your patient will take each pack.

5. Name the Pack
- In the pop-up window, name the pack (e.g., "Foundational Pack").

6. Set Product Quantities
- Specify the quantity for the products to be administered at that time of day.
- Click Save.

7a. Repeat for Additional Packs
- Repeat steps 4-6 for all desired packs.

7b. Add More Products (if needed)
- If additional products are required, click Add More Products.

8. Finalize the Order
- Once all packs are configured, click Finish Order.

1. Select the Subscription Duration
- Choose the desired duration for the subscription.

2. Provide Shipping and Billing Information
- If purchasing the order:
- Select the patient's shipping address and billing information from the dropdown menus.
- If sending the order to the patient:
- Leave these fields blank for the patient to complete.

3. Enable Patient Reorder (Optional)
- Toggle the Enable Patient Reorder option to allow the patient to reorder this subscription themselves after it ends

4. Apply Discounts (if applicable)
- Select a discount for the order and click Apply.

5. Agree to Terms and Conditions
- Check the box indicating you agree to the Terms and Conditions.

6. Complete the Order
- Choose one of the following options:
- Send to Patient
- The patient will review the order and can either accept or decline it.
- If accepted, the patient must input or select a credit card and shipping address before purchasing.
- Send to Patient
- Choose one of the following options:
- Purchase Order
- Use this option if the patient does not need to review the order and has a verified credit card on file.
- Purchase Order
Please note: There is an Edit Order button towards the top of the checkout page if more products need to be added to the order before checking out/finalizing an order.


CREATE PROTOCOL - Method 1: Create a New Protocol
1. Start the Protocol Creation
- Navigate to the Protocols tab and click Add Protocol.

2. Add Products
- Click the Add button on all products needed for the protocol.

3. Configure Protocol Packs
- After selecting all products, click Configure Protocol Packs at the bottom of the screen.

4. Name the Protocol
- On the configuration page, enter a name for the protocol.

5. Add Products to Packs
- Click Add Products for the specific time of day your patient will take each pack.

6. Name the Pack
- In the pop-up window, name the pack (e.g., "Foundation").
7. Set Product Quantities
- Specify the quantity for the products to be administered at that time of day.
- Click Save.
8. Repeat for Additional Packs
- Repeat steps 5-7 for all desired packs.

9. Add More Products (if needed)
- If additional products are required, click Add More Products.

10. Save the Protocol
- Once all packs are configured, click Save Protocol.

CREATE PROTOCOL - Method 2: Use a Trending Protocol
1. Select a Trending Protocol
- From the Protocols tab, choose a trending protocol and click Save to My Protocols.
2. Manage the Protocol
- Once saved, you can now Edit, Assign, or Delete the protocol with the Actions dropdown when it shows up as your own protocol under My Protocols:

SEND PROTOCOL - Method 1: From the Protocols Tab
1. Select a Protocol
- Navigate to the Protocols tab, go to the My Protocols section, and choose a protocol.
2. Open the Actions Menu
- Click the Actions dropdown and select Assign Protocol.

3. Choose Patient(s)
- Select either Individual Patient or Multiple Patients.
- If assigning to an individual patient:
- Select the intended patient from the dropdown menu.

4. Complete the Checkout
- Depending on the method, you can choose one of the following:
- Send to Patient
- You will be required to select the duration, and can also add the shipping address, payment method, discount or start date.
- Purchase for Patient
- You will be required to select a shipping address, payment method, and duration. You can also add a discount or start date.
- Send to Patient

SEND PROTOCOL - Method 2: From the Manage Patients Tab
1. Add a New Patient
- Click Add Patient under the Manage Patients tab.
2. Enter Patient Information
- Enter the patient's first name, last name, and email address.
3. Save the Patient
- Click Save.

4. Send Protocol with Invite
- Select Send Protocol with Invite.
5. Choose a Protocol and Duration
- Select one of your protocols and specify the duration.
6. Send the Invite
- Click Send Invite.
7. Optional Steps:
- Repeat for additional patients receiving the protocol.
- Include a Personalized Message:
- Check the option to add a personalized message.
- Enter a custom message (500 characters or fewer).


1. To log in or register, click on the account menu icon located in the upper right corner of the page.
2. Click My Account to access your general account information, payment methods, or shipping addresses and modify your password, first name, last name, or phone number.
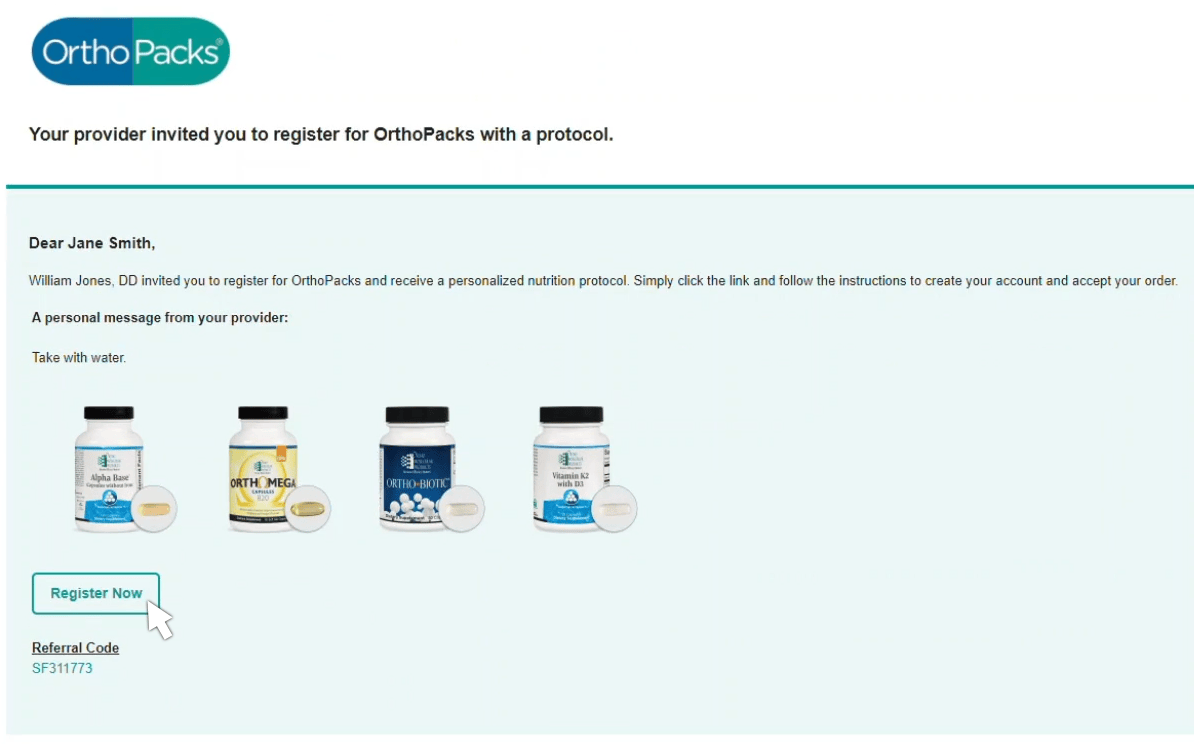
Method 1: Register via Email Invitation with Pending Order
1. Open the Email Invitation.
- Click Register Now in the email.

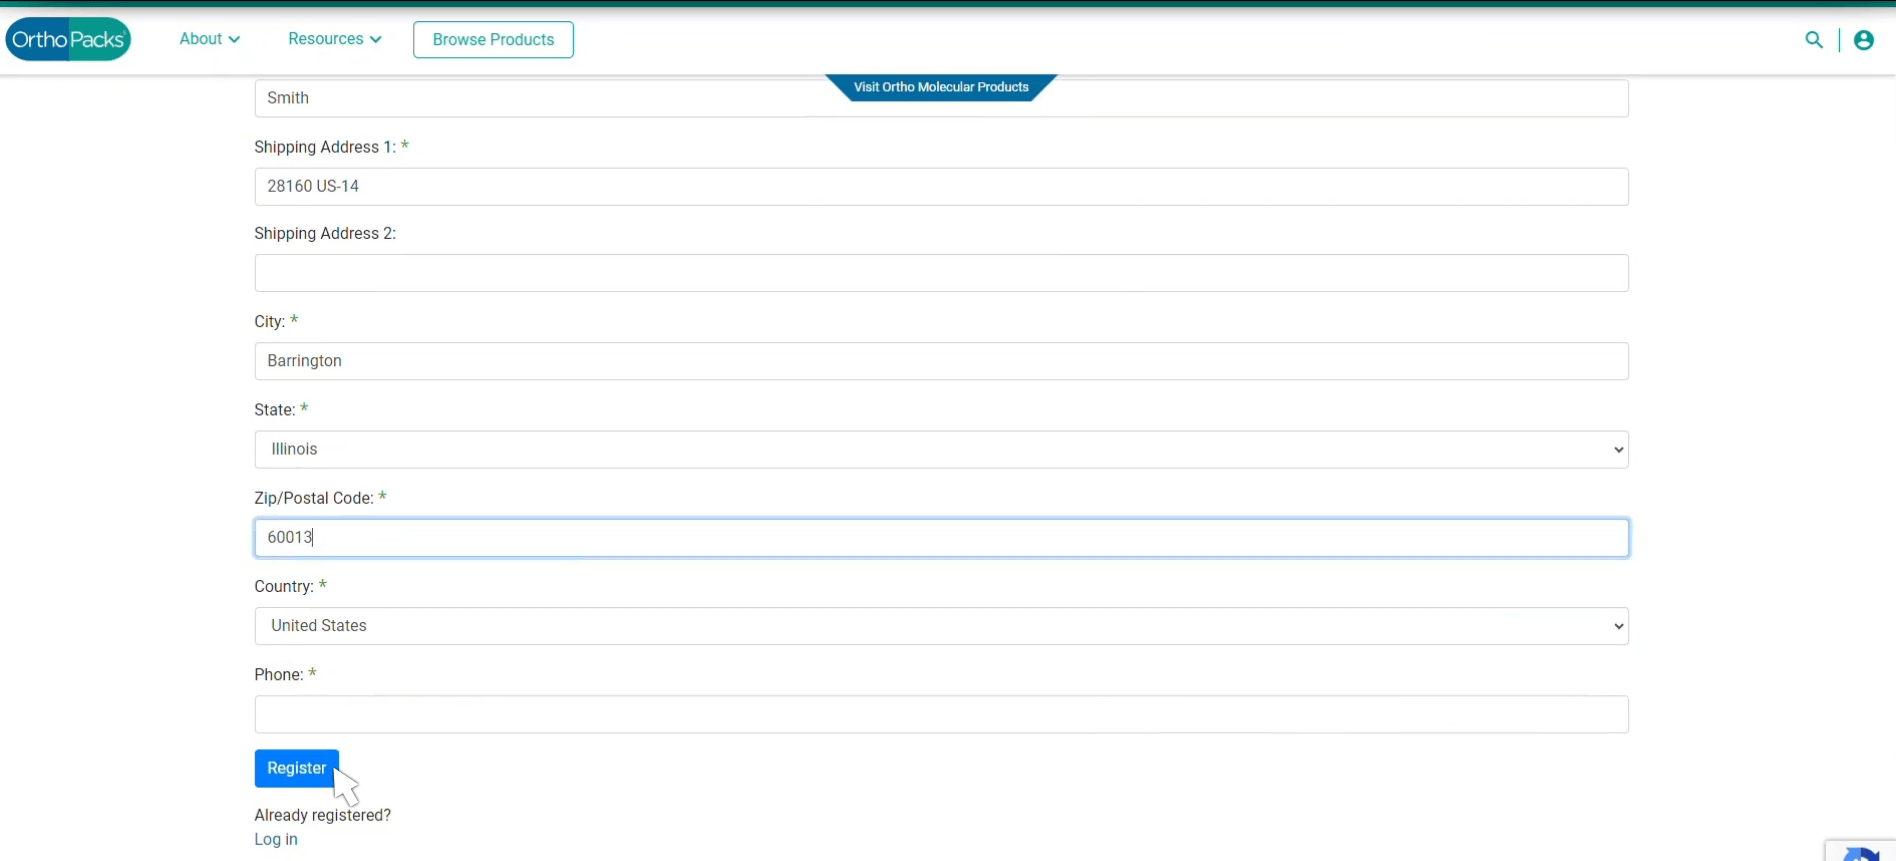
2. Complete the Registration Form
- Fill out all required fields in the patient registration form and click Register.
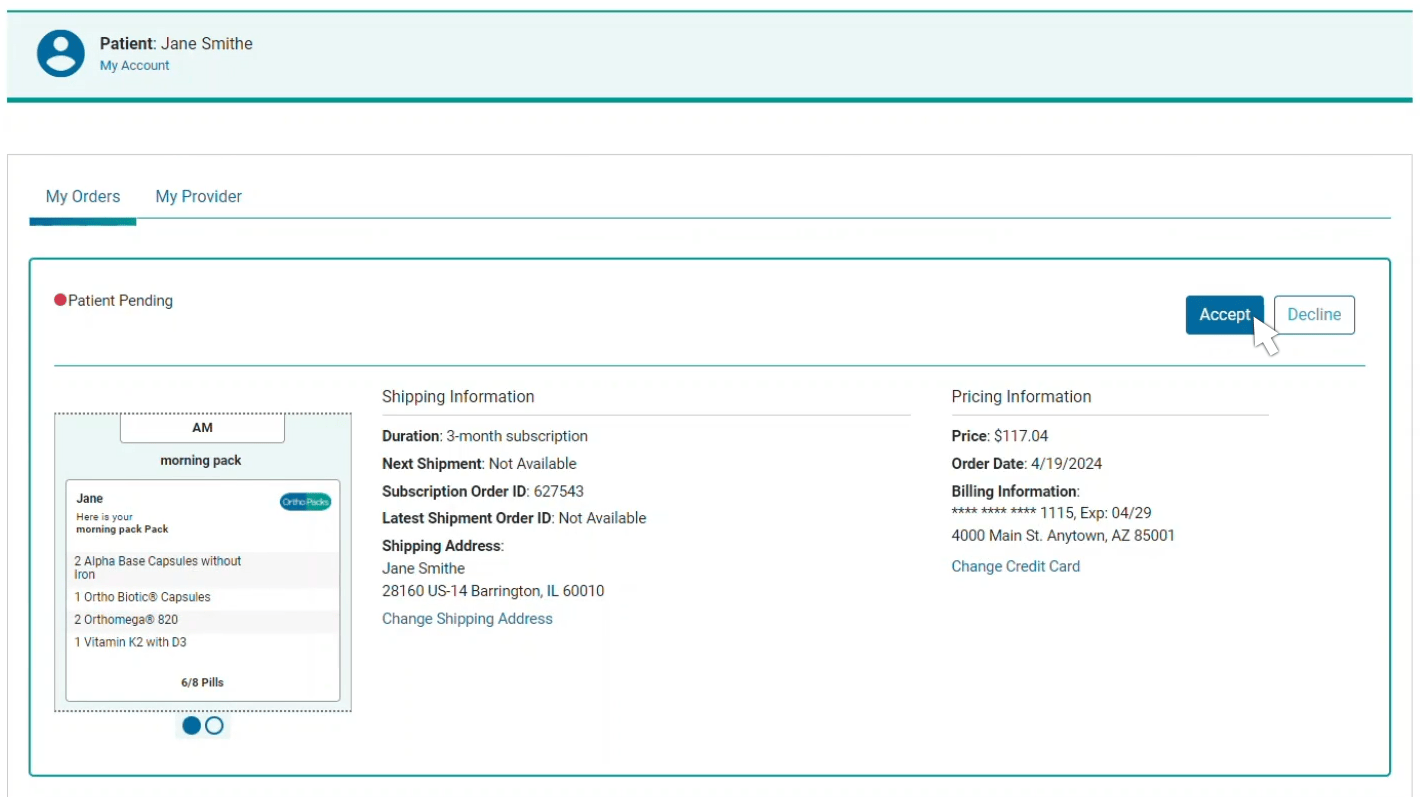
3. Review Your Orders
- After logging in, navigate to the Orders tab to accept or decline the pending order.

Method 2: Register via Email Invitation
1. Open the Email Invitation
- Click "Register Now" in the email.
2. Complete the Registration Form
- Fill out all required fields in the patient registration form and click Register.
Method 3: Register via Provider Code
1. Obtain the Registration Code
- Get the registration code from your provider.
2. Complete the Registration Online
- Visit orthoPacks.com/Registration/Patient and fill out the required fields in the registration form.

Method 4: Provider Completes Registration
1. Provider Completes the Form
- Your provider fills out the registration form on your behalf.
2. Update Password
- Your provider will create a temporary password, which you can update after logging in.

Method 1: Provider Places the Order on Your Behalf
1. Your provider can use your default shipping and billing information to place the order for you.
Method 2: Patient Reviews and Finalizes the Order
1. Review the Pending Order
- Go to the Orders tab and choose to accept or decline the pending order.

2. Proceed to Checkout (if accepted)
- If you accept the order, you will be redirected to the checkout page.
3. Select or Add Shipping and Payment Information
- Choose or add a shipping address and payment method.
4. Purchase the Order
- After reviewing the order and entering your shipping and payment details, click Purchase Order.

1. After receiving your email invitation, the patient can click "Register Now" (this process is the same as ).
2. The patient can then fill out the registration form and click "Register" to submit this information.
3. From there, the patient will log into their new account and automatically land on the "Order History" tab of the patient dashboard. The patient can then respond to the pending order you have created for them.